
A full home renovation always starts the same way: with a space that no longer works. In this case, we were appointed to completely transform a third-floor two-bedroom flat that had reached the point where a simple upgrade would not solve the underlying issues.
The property required a complete strip-out and rebuild. Outdated finishes, worn surfaces, ageing plumbing, and dark interiors meant the home needed a full reset. Our goal was simple: modernise the entire apartment, improve functionality, and brighten the space so that it felt open, clean, and comfortable again.
Projects like this require careful planning, especially when access is limited. Third-floor renovations introduce logistical challenges that need to be managed properly from the start.
Stripping the property back to the structure
The renovation began with a full demolition phase. Every room in the apartment was stripped down so that the space could be rebuilt correctly from the base.
The work included removing:
- Existing tiles and floor finishes
- Old cupboards and cabinetry
- Bathroom fittings and plumbing fixtures
- Damaged ceiling finishes and trim
- Interior doors and outdated fittings
Once demolition was completed, the flat was essentially reduced to its structural shell. This approach allows problems hidden behind old finishes to be identified early.
Many homeowners underestimate how important this phase is. A proper renovation process always starts with removing compromised materials so that new installations can last for years. Planning and sequencing like this is explained in more detail in Professional Contractors in Pretoria, South Africa.
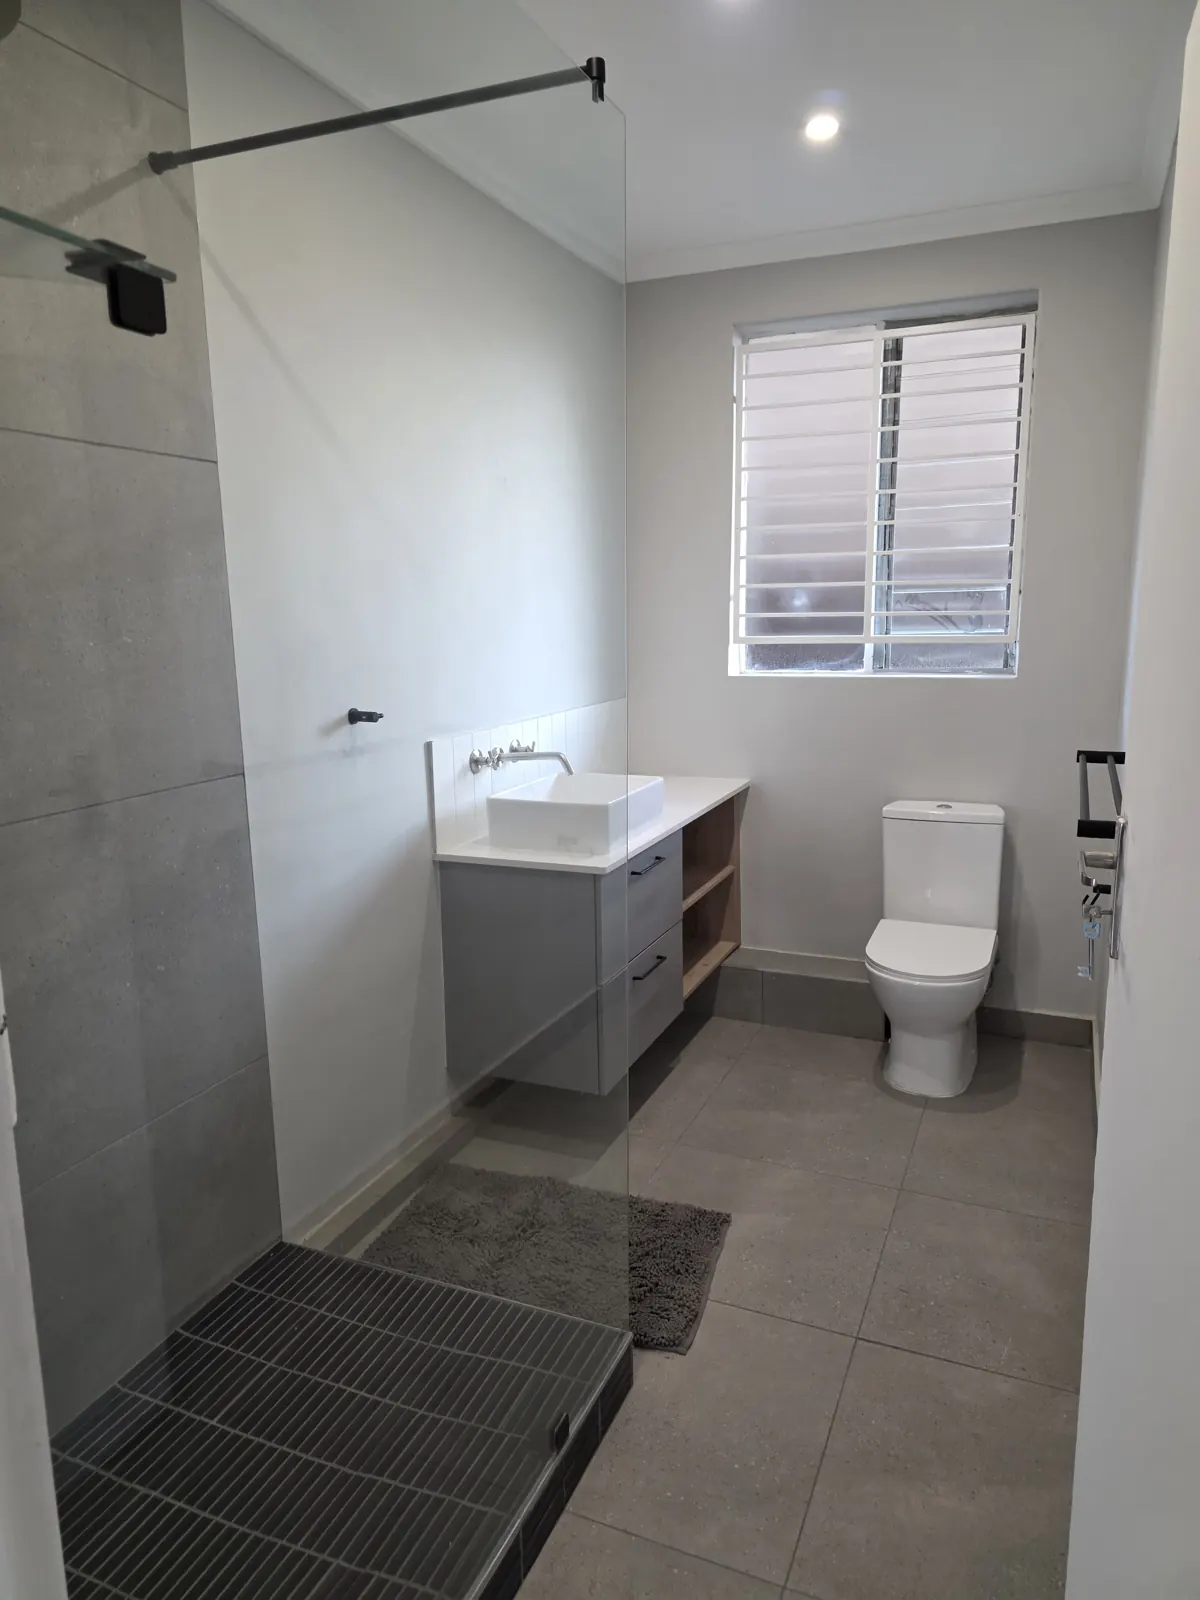
Bathroom renovation: walk-in shower and floating vanity
The bathroom received a complete redesign. The old layout was inefficient and the finishes had deteriorated significantly.
The renovation included:
- Installation of a modern walk-in shower
- New waterproofing system
- Retiling of floors and walls
- Installation of a floating vanity
- New plumbing fittings and fixtures
- Updated lighting and accessories
A walk-in shower was selected to maximise usable space and give the bathroom a modern, open feel. Waterproofing was applied before tiling to ensure long-term durability, which is one of the most important steps in any bathroom renovation.
Bathrooms are high-moisture areas, and preparation determines whether the installation lasts or fails. Proper waterproofing, tile preparation, and drainage alignment are essential for long-term performance.
Retiling and interior upgrades
After demolition and plumbing work were completed, the apartment was retiled throughout to give the entire space a consistent finish.
The flooring upgrade included:
- Removal of old floor surfaces
- Subfloor preparation
- Installation of new floor tiles across the apartment
- Clean grout finishing
Replacing the flooring throughout the property helps unify the space and removes the visual breaks created by outdated finishes. Along with the flooring upgrades, the interior was repainted to brighten the living areas and bedrooms. Fresh paint and new flooring dramatically improve how natural light reflects through the property, which is especially important in apartments where natural light may be limited.
Upgrading bedrooms and cupboards
Both bedrooms were upgraded as part of the renovation.
The improvements included:
- New interior finishes
- Fresh paintwork
- Replacement cupboards and storage
- Improved lighting
Although Plexi Renovations provides carpentry services, the cupboard installation for this project was completed by a specialist contractor working alongside our team. Coordinating different trades is common in full renovations, and proper sequencing ensures each contractor completes their work correctly.
Knotty pine ceiling transformation
One of the most noticeable improvements in the apartment was the transformation of the knotty pine ceilings.
Knotty pine can darken interiors over time, especially in older apartments. Many homeowners want to paint over it, but doing so incorrectly often leads to the wood resin bleeding through the paint later.
The ceiling preparation included:
- Thorough sanding of the timber surface
- Cleaning and dust removal
- Application of a specialised primer to block resin bleed
- Final painting with a durable ceiling paint finish
Without the correct primer, knots and resin marks will eventually show through the paint. Proper preparation ensures a clean and consistent finish that remains stable over time. Once completed, the painted knotty pine dramatically brightened the apartment and made the ceilings feel higher and more modern.
Aluminium and additional improvements
The renovation also included minor aluminium upgrades to improve the functionality and finish of the apartment, such as window adjustments, sliding door maintenance, and frame replacements where required.
The challenge of third-floor renovations
Working on a third-floor property adds a layer of complexity that does not exist in ground-level renovations.
Material removal, demolition waste, and construction debris must be carefully managed to avoid damage to shared building areas. In this project, waste and demolition materials were removed using a controlled chute system to safely transport debris from the third floor to ground level. This method keeps common areas clean and protects the building structure.
Planning access and material movement is one of the most important aspects of apartment renovations. Without a structured approach, projects like this can quickly become disorganised.
Final result
By the end of the project, the apartment had been completely transformed. The once outdated flat now features modern finishes, improved lighting, a redesigned bathroom, upgraded bedrooms, and a much brighter interior.
Full renovations like this require careful coordination, skilled trades, and a structured approach from demolition to final finishes. See the before, during and after photos of this flat, our home renovations page, or contact us if you are planning a similar upgrade.