
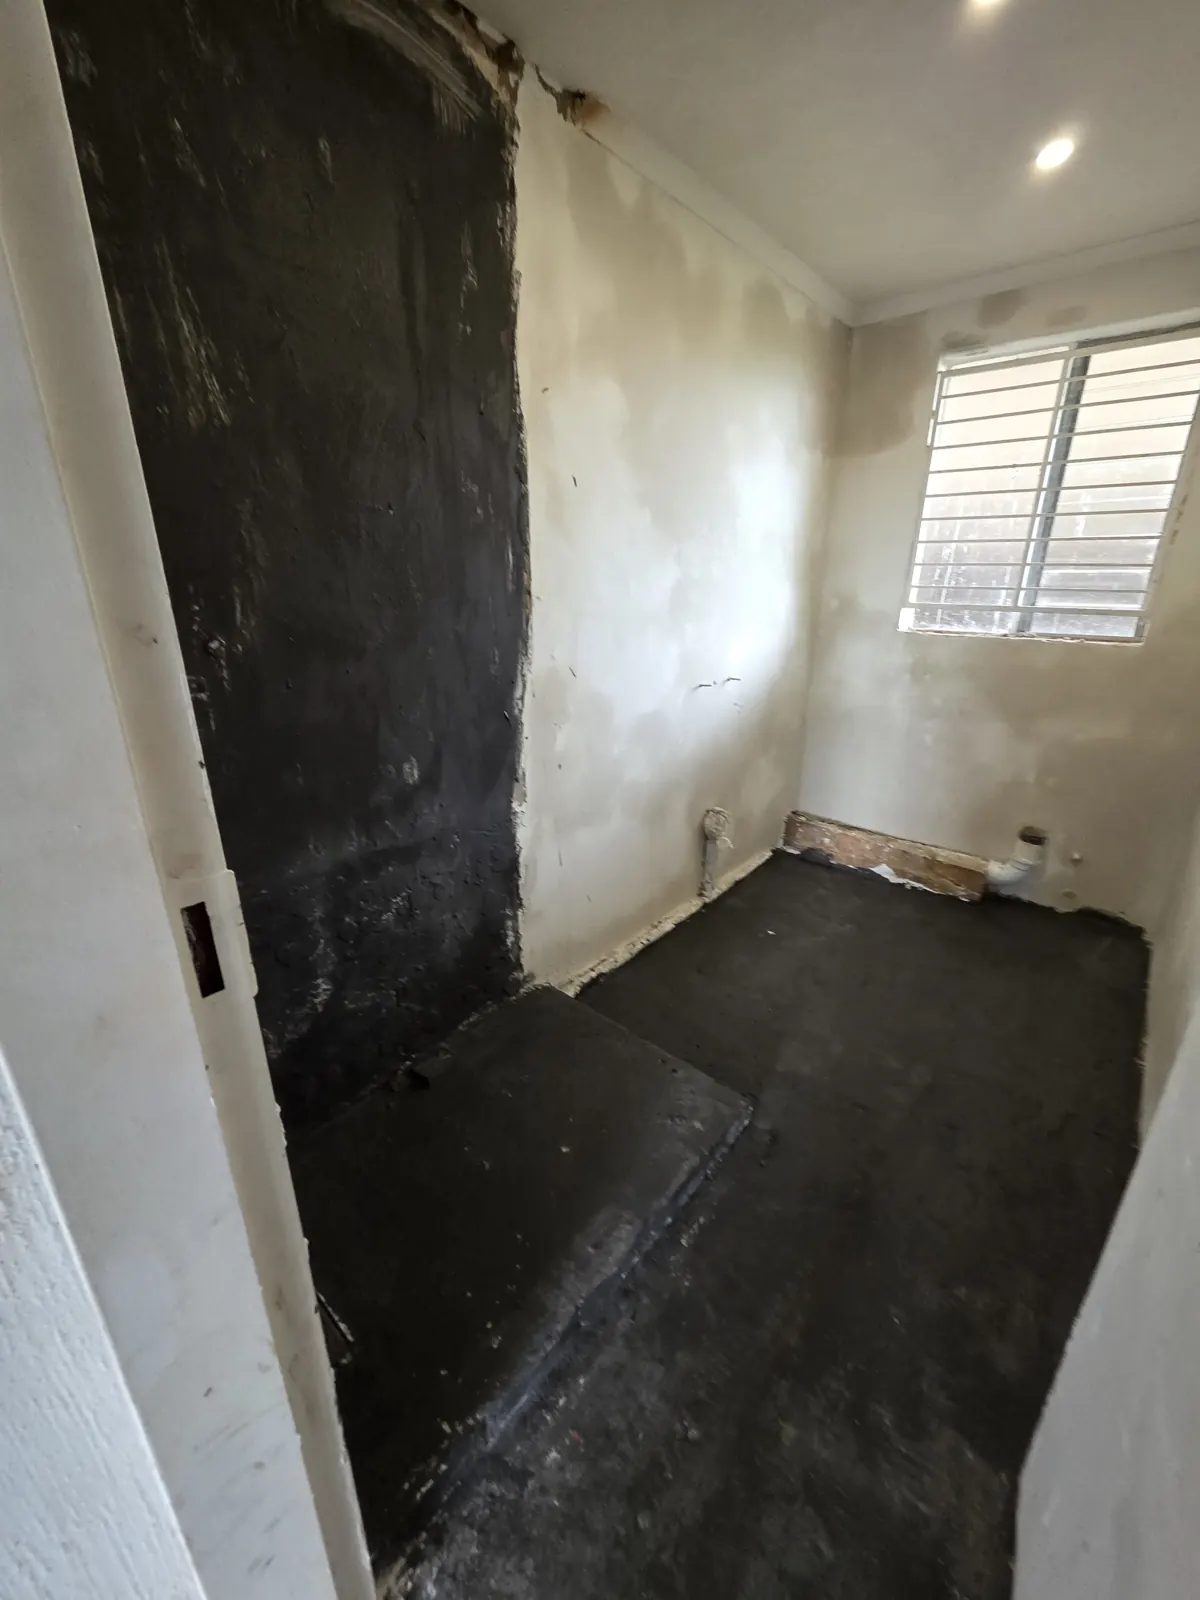
Most people assume tiles and grout keep water out of a shower. They do not. Grout is porous, tiles crack, and water finds its way through the smallest gap. What actually stops water reaching your walls, floor slab and the room next door is the waterproofing underneath the tiles.
Once the tiles are on, you cannot see it, and you cannot easily fix it. That makes waterproofing the one step in a bathroom renovation that has to be right the first time. This guide explains what should happen before tiling, where things usually go wrong, and what to ask your contractor.
Why waterproofing matters more than the tiles
A shower gets wet every day, often several times a day. Water that gets behind the tiles soaks into the screed, the plaster and the brickwork. It can travel a long way before it shows up as a damp patch on a passage wall, bubbling paint, a musty smell or a stain on the ceiling below.
By the time you see the damage, the water has usually been getting in for months or years. Fixing it then means taking the tiles off, drying out the walls and floor, and starting again. Good waterproofing costs far less than redoing a bathroom.
Where bathrooms usually leak
Leaks are rarely in the middle of a flat wall. They happen at the weak points, so these are the areas that need the most attention:
- The shower floor, especially around the drain or waste outlet
- The corners where walls meet the floor and where two walls meet
- Around pipe penetrations such as the mixer, shower arm and any outlets
- The threshold or step at the edge of the shower
- Around the bath, where the bath meets the wall
- Joints where different materials meet, such as a board wall against brick
A good contractor treats these spots separately, often with reinforcing tape or fabric in the corners and collars or extra coats around pipes and drains, before the main coats go over the whole area.
Preparing the surface first
Waterproofing only works if it sticks to a sound surface. Before anything is applied, the old tiles and adhesive should be removed, loose plaster dealt with, and cracks repaired. The surface needs to be clean, free of dust and dry enough for the product being used.
The shower floor should already have its fall towards the drain built into the screed. Waterproofing follows the shape of the floor underneath it. If the screed is flat or slopes the wrong way, water will sit on top of the membrane under the tiles, and no amount of waterproofing makes up for that. This is also why the drain and floor levels need to be settled during the plumbing stage. Our guide to walk-in showers explains how the drain height decides whether a level shower is possible.
Layers, coverage and drying time
Most bathroom waterproofing systems are applied in more than one coat. A single thin coat leaves pinholes and thin spots that you cannot see by eye. Building up the coats gives an even, continuous layer.
On our waterproofing and bathroom work, we apply waterproofing in several layers and use different colours for different layers. That way we can see at a glance which coats are done and that every area is covered, especially around the shower floor, corners and pipe penetrations.
Drying time matters just as much as the number of coats. Each product has its own instructions for how long to wait between coats and before tiling. Rushing this to get the tiler started a day earlier is a false saving. Ask what product is being used, and check that the drying times on the label are being followed.
How far up the walls should it go?
The shower floor is the obvious area, but water splashes well up the walls. As a general rule, the whole shower floor and the shower walls should be waterproofed, with the floor coats turned up onto the walls so there is no gap at the corner. Many contractors take it to full height in the shower, and continue it over the bathroom floor and around the bath as well.
There is no single answer for every bathroom. It depends on the layout, whether the shower is open or enclosed, and how wet the rest of the floor gets. What matters is that the contractor can explain where the waterproofing will go and why, before they start.
What to check before the tiles go on
This is the last chance to see the waterproofing before it disappears for good. If you can, look at it yourself or ask for photos. Things worth checking:
- The whole shower floor and the agreed wall areas are covered, with no bare patches
- The corners and the joint between floor and walls are fully sealed
- Pipe outlets and the drain have been properly sealed around
- The coats look even, without obvious thin spots, bubbles or cracks
- The product has had its full drying time before tiling starts
Some contractors also do a water test on the shower floor before tiling, leaving it flooded for a period to check for leaks. It is worth asking whether this will be done on your job.
Tiling over the waterproofing
Once the waterproofing is done and dry, the tiler has to be careful not to damage it. The tile adhesive must be suitable for use over the waterproofing product, and fixings should not be drilled through the shower area unless they are sealed properly afterwards.
Silicone at corners, around the bath and at the shower glass is a maintenance item, not a substitute for waterproofing. It keeps water out of the joints, but it wears over time and should be checked and redone when it starts to lift or discolour.
See it on a real job
If you want to see what this stage looks like, our third-floor flat renovation in Pretoria shows a bathroom stripped back with the waterproofing applied to the shower area and floor before tiling. For a finished example, the Olympus bathroom renovation included a full bathroom rebuild and extensive waterproofing across the whole house.
Planning a bathroom renovation or worried about a leaking shower? Contact us to book a site visit and get an itemised quote.